
An Best Apple Crisp Recipe baked in the oven fills the house with warm feelings of autumn thanks to the smell of cinnamon and brown sugar baked with apples. The dish is perfect for serving to your family because it meshes well with vanilla ice cream. You seek it for any reason and it delivers.
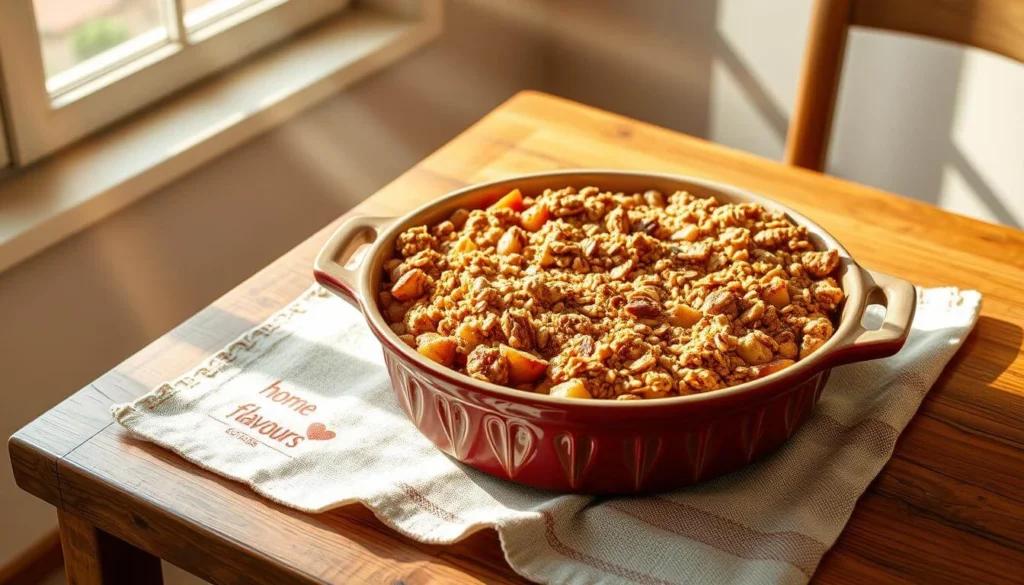
Table of Contents
This guide comes with the perfect tips on what kind of apples would work best, what type of topping would give it the most ‘crunch’, and the best methods to serve and store the dish. Anyone with an interest in cooking, no matter their experience level, will find this sweet treat a worthwhile addition to their collection of recipes.
As the warm scents flow out of the oven, the readers are guaranteed some level of satisfaction as their senses are appealed towards. Following this phrase makes prompting smoothies as easy as scolding a child.
🧾 Ingredients for the Best Apple Crisp Recipe
Creating the ultimate apple crisp begins with selecting quality ingredients. Here’s a detailed breakdown:
Apples
- Varieties: Granny Smith, Honeycrisp, or a mix for balanced sweetness and tartness.
- Quantity: Approximately 6 large apples (about 2½ pounds), peeled, cored, and thinly sliced.
Filling Enhancers
- Lemon Juice: Juice of 1 lemon to prevent browning and add brightness.
- Granulated Sugar: ½ cup to sweeten the filling.
- Cornstarch: 2 tablespoons to thicken the filling.
- Ground Cinnamon: 1 teaspoon for warmth and flavor.
Crisp Topping
- Rolled Oats: 1½ cups for a hearty texture.
- All-Purpose Flour: 1 cup to bind the topping.
- Brown Sugar: ½ cup, packed, for sweetness and moisture.
- Unsalted Butter: 12 tablespoons (1½ sticks), melted.
- Vanilla Extract: 1 teaspoon to enhance flavor.
- Kosher Salt: ½ teaspoon to balance sweetness.
🥣 Step-by-Step Guide to Making Best Apple Crisp Recipe
Follow these detailed steps to create a delectable apple crisp:
1. Preheat the Oven
- Set your oven to 350°F (175°C) and position a rack in the middle.
2. Prepare the Apple Filling
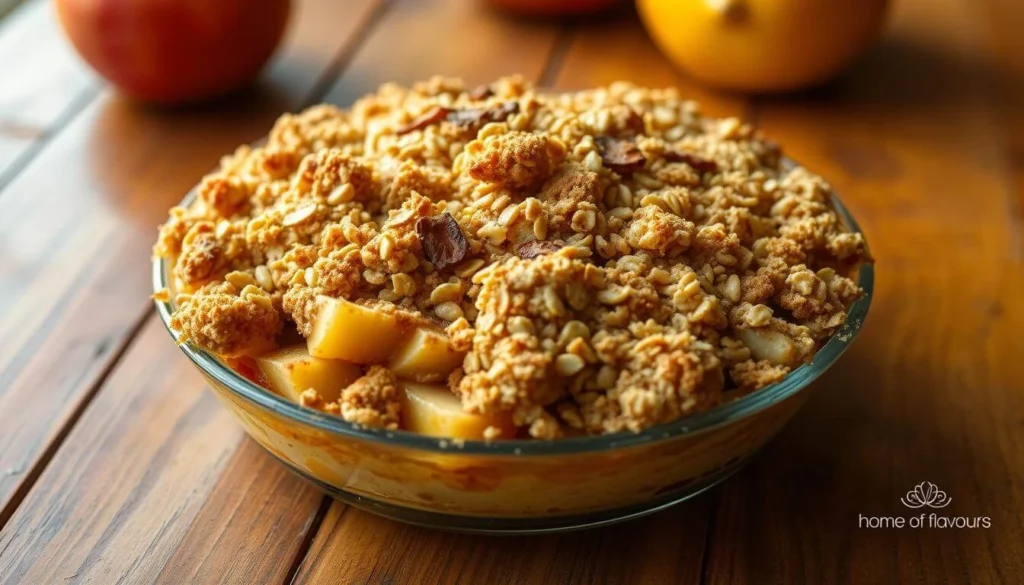
- In a large bowl, combine the sliced apples with lemon juice, granulated sugar, cornstarch, and ground cinnamon. Toss until the apples are evenly coated.
3. Assemble the Crisp
- Transfer the apple mixture to a buttered 9-inch square baking dish, spreading it evenly.
- In a separate bowl, mix the rolled oats, flour, brown sugar, and salt. Drizzle in the melted butter and vanilla extract, stirring until the mixture forms coarse crumbs.
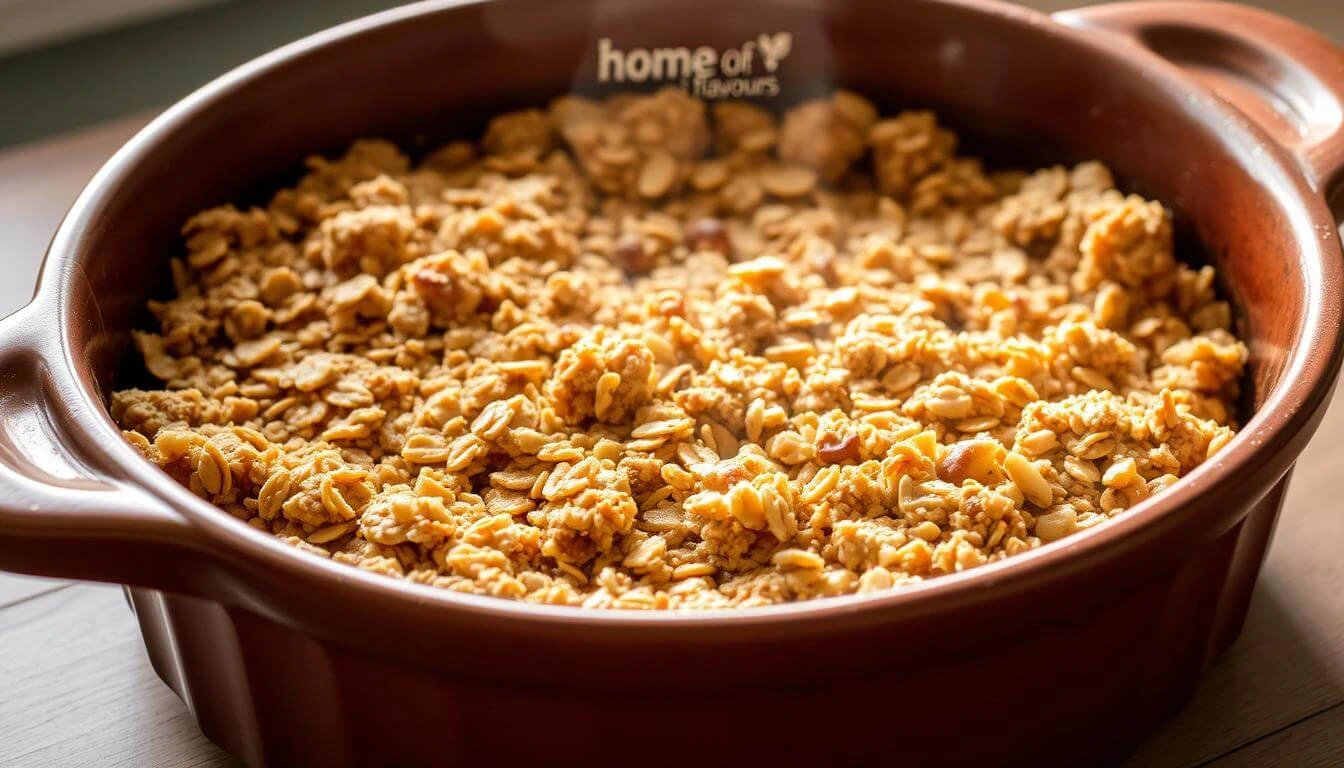
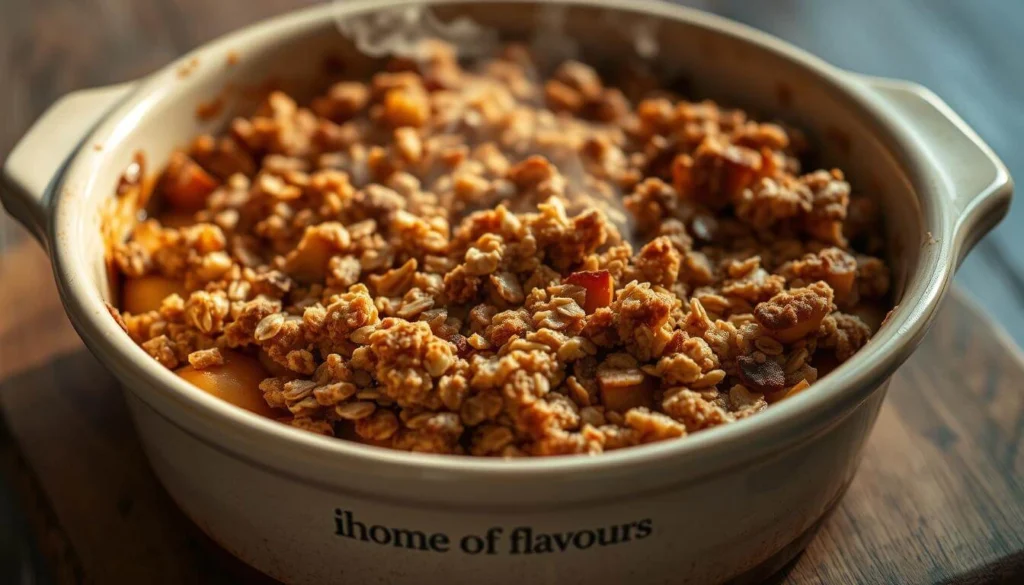
- Evenly sprinkle the topping over the apple filling, leaving some larger clumps for texture.
4. Bake the Crisp
- Place the dish in the preheated oven and bake for 50 to 60 minutes, or until the topping is golden brown and the filling is bubbling around the edges.
5. Cool and Serve
- Allow the crisp to cool on a wire rack for at least 15 minutes before serving. This rest time helps the filling set and enhances the flavors.
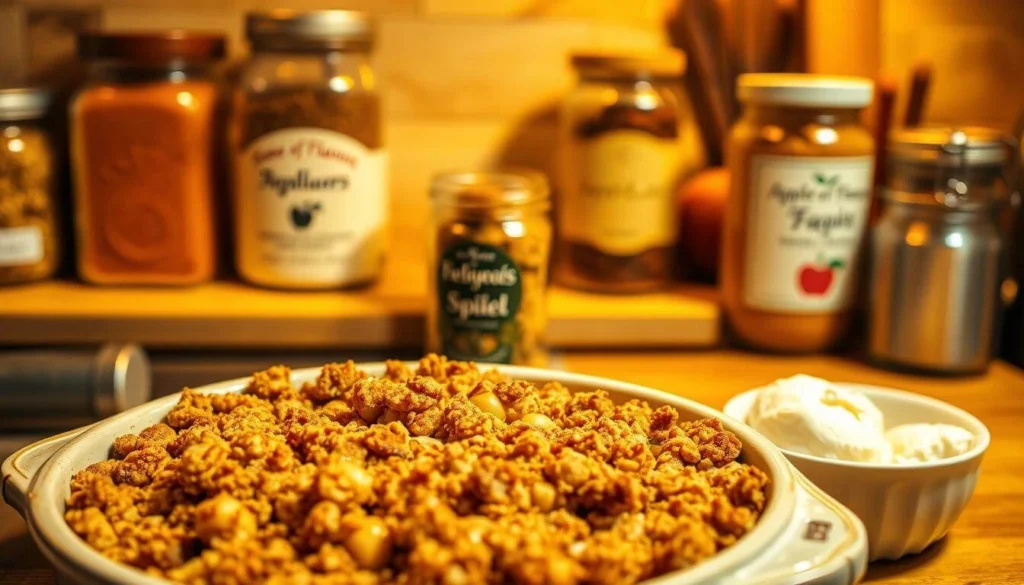
🍽️ Serving Suggestions and Pairings
Elevate your apple crisp experience with these serving ideas:
Classic Accompaniments
- Vanilla Ice Cream: A scoop of creamy vanilla ice cream complements the warm crisp perfectly.
- Whipped Cream: Light and airy whipped cream adds a delightful contrast.
Gourmet Twists
- Caramel Drizzle: A drizzle of caramel sauce introduces a rich, buttery sweetness.
- Spiced Nuts: Sprinkle chopped spiced pecans or walnuts for added crunch and flavor.
Beverage Pairings
- Hot Beverages: Pair with a cup of coffee, chai tea, or spiced cider for a cozy treat.
- Dessert Wines: Serve alongside a glass of sweet dessert wine like Moscato or Riesling.
🔄 Variations and Dietary Adaptations
Customize your apple crisp to suit different dietary needs and preferences:
Gluten-Free Option
- Flour Substitute: Use a gluten-free all-purpose flour blend in place of regular flour.
- Certified Gluten-Free Oats: Ensure your oats are certified gluten-free to avoid cross-contamination.
Vegan Adaptation
- Butter Alternative: Replace butter with coconut oil or a plant-based margarine.
- Sugar Consideration: Use organic sugars to ensure they are vegan-friendly.
Fruit Variations
- Mixed Fruits: Incorporate pears, berries, or peaches for a different flavor profile.
- Dried Fruits: Add raisins or dried cranberries for added sweetness and texture.
Spice Enhancements
- Additional Spices: Experiment with nutmeg, allspice, or cardamom to deepen the flavor.
- Citrus Zest: Add lemon or orange zest to brighten the taste.

📦 Storage Tips and Make-Ahead Options
Ensure your apple crisp remains delicious with these storage and preparation tips:
Storing Leftovers
- Refrigeration: Cover and store in the refrigerator for up to 5 days.
- Freezing: Freeze the baked crisp for up to 3 months. Thaw in the refrigerator overnight before reheating.
Reheating Instructions
- Oven Method: Reheat in a 350°F (175°C) oven for 20-30 minutes until warmed through.
- Microwave Option: For individual servings, microwave on medium power for 1-2 minutes.
Make-Ahead Tips
- Prepare Topping in Advance: Make the crisp topping ahead of time and store it in the refrigerator for up to 3 days or freeze for up to a month.
- Assemble Before Baking: Assemble the crisp and refrigerate it for up to 24 hours before bakingE .
America’s Most Traditional Dessert: TheBest Apple Crisp Recipe
Out of all American desserts, few capture the heart of the country as staple comfort food as the apple crisp. Sweet, tender apples laced with cinnamon nestled in between layers of oat, golden buttery crust, and literally singing to the family gatherings in holidays and family dinners, this rustic dish has worked its way to being a long favorite. Unlike pies which require much more effort and precision, apple crisp is a definate crowd pleaser with big flavor and minimum fuss, making it immensely popular among all home bakers weather novice or professional.
Flexible and derived from traditions, apple crisp has kept its place ever since its surge in popularity in the early 20th century and crisp has been a household summer dessert ever since. These tender beauties are adored the most during ‘apple picking season’, when the ozone is so full of freshly harvested apples, it makes the dish so satisfying in warm weather. Be it plain, with cream dollops or a scoop of vanilla ice cream, apple crisp never turns out to be unfashionable.
🕰️ History and Origins of the Traditional for Best Apple Crisp Recipe
Apple crisp-its American origins took true bookkeeping as frugal cooks turned simple ingredients into soul-satisfying crowd-pleasers. The method to make apple pie has been around for centuries, with attendant precision, time, and tool requirements-as such, it was beyond the reach of many. Of course, apple crisp was a rather rustic-yet-easy alternative that preserved the aroma and warmth associated with baked apple desserts.
The earliest printed reference to Best Apple Crisp Recipe appeared in Isabel Ely Lord’s “Everybody’s Cookbook: A Comprehensive Manual of Home Cookery” in 1924. The apple crisp quickly gained traction during the Great Depression, when resources for piecrusts such as butter and lard were hard to come across. Apples, on the other hand, with inexpensive pantry staples such as oats, sugar, and flour, were readily available.
Yet another factor contributing to the rise in apple crisp’s fame is its versatility: perhaps simple to whip up, home bakers were free to improvise with whatever they had available- different types of apples, sugars, and toppings made it both an economical and customizable dessert. The term apple crisp became synonymous with autumn, Thanksgiving, and American culture over the years.
Apple crisp is now an all-season dessert in the U.S.; however, it enjoys the utmost favor in the autumn, when orchards are rich with ripe apples. Today, many variations have emerged—including gluten-free, vegan, and even gourmet adaptations—all these continue to embrace the homey spirit of the original.
🧑🍳 Expert Tips for a Foolproof Apple Crisp
Even a simple dessert like apple crisp benefits from a few pro tips to ensure it turns out perfectly every time. Here are expert tricks to elevate your crisp from good to unforgettable:
1. Choose the Right Apples
Use a combination of sweet and tart apples for a balanced flavor and firm texture. Granny Smith, Honeycrisp, and Braeburn hold their shape well during baking. Avoid overly soft varieties like Red Delicious.
2. Slice Apples Evenly
Uniform slices ensure even cooking. Aim for about ¼-inch thickness—not too thin or they’ll turn mushy, not too thick or they’ll stay undercooked.
3. Don’t Skip the Lemon Juice
A splash of lemon juice adds brightness and prevents the apples from browning. It also balances the sweetness of the filling.
4. Use Cold Butter for a Crumbly Topping
For a crisp, crumbly topping, use cold or melted unsalted butter and work it into the flour-oat mixture just until crumbs form. Avoid overmixing, or it will become doughy.
5. Let It Rest Before Serving
Fresh from the oven, apple crisp needs 15–20 minutes to cool slightly. This helps the juices thicken and flavors develop, making for cleaner slices and better texture.
6. Make It Ahead with Confidence
Assemble your crisp and refrigerate it (unbaked) for up to 24 hours. When ready, bake straight from the fridge—just add a few extra minutes to the baking time.
7. Use a Baking Dish with High Sides
This prevents bubbling juices from spilling over and ensures even heat distribution. A 9×9-inch square or 2-quart baking dish is ideal.
8. Enhance the Flavor with Spices and Add-ins
A pinch of nutmeg, cardamom, or even a touch of ginger adds warmth. Toss in chopped pecans, walnuts, or dried cranberries for extra flavor and texture.
✨ Achieving the Perfect Texture
The magic of a great apple crisp lies in the contrast between the soft, juicy apple filling and the crunchy, golden topping. Getting that texture just right is what transforms a good crisp into a truly unforgettable dessert. Here’s how to master both layers:
1. Balance Moisture in the Filling
The apples release juice as they bake, which can lead to a soggy crisp if not managed. To avoid this:
- Use firm apples that hold their shape.
- Add cornstarch or flour to the filling—it thickens the juices as they cook.
- Allow the crisp to cool slightly after baking, so the filling sets properly.
2. Keep the Topping Crisp
The topping should be crumbly and golden, not doughy or soggy. To achieve this:
- Use the right ratio of butter, oats, flour, and sugar.
- Don’t overmix—leave some large crumbs for better texture.
- Bake uncovered so the topping crisps up in the oven.
3. Watch Your Bake Time
Underbaking can lead to a pale topping and firm apples, while overbaking may dry things out. The sweet spot is usually:
- 50–60 minutes at 350°F (175°C), until the topping is golden and you see bubbling fruit juices at the edges.
4. Reheat Without Losing Crunch
If you’re reheating leftovers, use the oven rather than the microwave. A quick reheat in a 350°F oven for 10–15 minutes will revive the crisp texture without softening the topping.
🍽️ Delicious Variations of the Classic Recipe
Once you’ve mastered the classic apple crisp, it’s easy—and fun—to get creative! Whether you’re catering to dietary needs, adding seasonal ingredients, or just switching things up, these delicious variations keep your crisp exciting and new.
1. Apple Berry Crisp
Add a burst of color and tang with fresh or frozen berries. Blueberries, raspberries, or cranberries blend beautifully with apples and add a juicy pop of flavor. Reduce the sugar slightly to account for the berries’ natural sweetness.
2. Caramel Apple Crisp
Drizzle caramel sauce over the apples before adding the topping, or mix caramel bits right into the filling. The result? A gooey, decadent version that tastes like a caramel apple in crisp form.
3. Apple Pear Crisp
Mix sweet, ripe pears with apples for a softer, more delicate texture. Bosc or Anjou pears hold up well to baking and add a subtle floral note.
4. Gluten-Free Apple Crisp
Make it gluten-free by using almond flour or oat flour instead of all-purpose, and certified gluten-free oats. The result is just as delicious and safe for those with sensitivities.
5. Vegan Apple Crisp
Swap out butter for coconut oil or vegan margarine, and ensure your sugar and oats are vegan-friendly. Serve with dairy-free vanilla ice cream for the full plant-based experience.
6. Nutty Apple Crisp
Stir chopped pecans, walnuts, or almonds into the topping for an added layer of crunch and nutty flavor. It’s a great way to enhance both texture and nutrition.
7. Spiced Apple Crisp
Take your spice game beyond cinnamon—try cardamom, allspice, nutmeg, or ginger. These warm spices create a more complex, aromatic dessert perfect for fall and winter.
📦 Storage, Make-Ahead, and Reheating Tips
One of the best things about apple crisp is how well it keeps! Whether you’re preparing for a busy week, hosting guests, or just want to enjoy it over several days, here’s everything you need to know about storing, making ahead, and reheating your crisp.
1. Storing Leftovers
Apple crisp stores beautifully, and the flavors even improve after a day or two in the fridge.
- Refrigeration: After baking, cover the dish tightly with foil or plastic wrap and store in the fridge for up to 5 days.
- Freezing: For longer storage, Best Apple Crisp Recipe can be frozen (baked or unbaked). Just wrap the dish in plastic wrap and aluminum foil, then freeze for up to 3 months. To bake from frozen, let it thaw in the refrigerator overnight, and then bake at 350°F (175°C) for 50–60 minutes.
2. Make-Ahead Tips
Apple crisp is an excellent dessert to prepare in advance, saving time and hassle.
- Prepare the Topping and Filling Separately: You can prepare the apple filling and topping separately up to a day ahead of time. Store the filling in an airtight container in the refrigerator, and keep the topping in a separate bowl or bag.
- Assemble Before Baking: When ready to bake, simply assemble the crisp in your baking dish and pop it into the oven. If baking from cold, add 5-10 extra minutes to the baking time.
3. Reheating Leftovers
The key to keeping that crisp texture intact is to reheat gently.
- Oven Method: To reheat an entire batch, preheat your oven to 350°F (175°C) and bake for 15-20 minutes, until the topping is crisp again and the filling is bubbling.
- Microwave Method: For individual servings, microwave on medium heat for 1-2 minutes, or until warmed through. The topping won’t be as crispy, but it’s a quick fix when you’re craving a slice fast!
4. Freezer-Friendly Option
If you’re looking to make apple crisp ahead of time and want to have it on hand for a future occasion, it’s freezer-friendly:
- Unbaked Apple Crisp: Assemble the crisp in your baking dish and cover tightly. Freeze for up to 3 months. When ready to bake, don’t thaw—just pop it directly into the oven, increasing the baking time by about 10-15 minutes.
- Baked Apple Crisp: Allow the baked apple crisp to cool completely, then wrap tightly in foil and freeze. Reheat in the oven at 350°F (175°C) for 20-30 minutes until heated through.
🔥 Best Methods for Reheating Best Apple Crisp Recipe
Reheating apple crisp properly is key to preserving the delightful combination of a warm, gooey apple filling and a crispy, buttery topping. Here are the best methods for reheating your apple crisp, whether you’re reheating a whole batch or just a single serving.
1. Oven Method: Best for Maintaining Crisp Texture
The oven is the best choice for reheating apple crisp because it helps restore the crunch of the topping and ensures the filling is heated evenly.
- Preheat the oven to 350°F (175°C).
- If reheating a whole batch, cover the dish with foil to prevent the topping from over-browning or drying out.
- Bake for 15-20 minutes, or until the topping is golden brown and the filling is bubbly. If you prefer extra crunch, remove the foil during the last 5-10 minutes of baking to allow the topping to crisp up even more.
- For a crisp, fresh-out-of-the-oven result, let the apple crisp rest for 5 minutes before serving.
2. Microwave Method: Quick and Convenient
If you’re just reheating a single serving or you’re in a hurry, the microwave is a great option for convenience. However, the topping may lose some of its crispness when microwaved.
- Place a serving of apple crisp in a microwave-safe dish.
- Cover with a damp paper towel to help prevent the topping from becoming too dry.
- Microwave on medium power for 1-2 minutes, or until the apple filling is heated through and the juices are bubbling.
- For extra texture, you can microwave the filling first, then toast the topping in a skillet for a couple of minutes until it’s crunchy.
3. Skillet Method: Best for a Crispy Topping
For those who love their topping extra crispy and have a little more time, the skillet method is a fantastic way to reheat apple crisp. This method adds an extra layer of crunch to the topping.
- Heat a skillet over medium heat and add a small amount of butter or oil.
- Place individual servings of apple crisp in the skillet and cover with a lid.
- Heat for 5-7 minutes, occasionally stirring the filling to prevent burning, until the filling is hot and the topping is golden and crispy.
- This method is perfect for getting that crisp, caramelized topping.
4. Air Fryer Method: Crispy and Quick
The air fryer is a newer tool for reheating, and it’s a great way to crisp up the topping without having to heat up your entire oven.
- Preheat your air fryer to 350°F (175°C).
- Place individual servings of Best Apple Crisp Recipe in the air fryer basket (you may need to reheat in batches).
- Air fry for 5-7 minutes, or until the topping is golden brown and the filling is bubbling. Check halfway through to ensure it’s not overcooking.
Conclusion: Enjoying Your Homemade Apple Crisp
There’s something about putting a Best Apple Crisp Recipe on the table, warm from the oven. It’s that gentle harmony of sweet and tangy apples with that buttery, crunchy topping that feels comforting and delicious. It fits any way you could want to use it: a family dinner, a holiday gathering, or just a quiet night in; apple crisp is a year-round treat that works.
With all these tips and variations, you’re now able to make your apple crisp version in accordance with your tastes and dietary requirements. This dessert can be presented in countless ways, from traditional apple crisp to the exciting twist of caramel, berry, or gluten-free varieties.
Best of all, you can usually whip it up ahead of time and store any extras for a quick reheat whenever the mood strikes. Pull out that apple crisp, drive everyone mad with the warm flavors of vanilla ice cream and caramel sauce, and relish every single bite. The best part of all gets better: just as intoxicating is the smell of apples and cinnamon wafting through the air in your kitchen. It’s even better when you finally get to taste it: warm, sweet, and so satisfying.
FAQ
What is the best type of apple to use for apple crisp?
A mix of sweet and tart apples works Best Apple Crisp Recipe. Try using Granny Smith, Fuji, or Honeycrisp apples. They hold their shape and offer a great flavor balance.
Can I make apple crisp ahead of time?
Yes, you can prepare the apple filling and crisp topping a day in advance. Then, just before serving, assemble and bake them.
How do I keep my apple crisp from becoming soggy?
To avoid a soggy topping, make sure the apples aren’t too wet. Use the right amount of sugar and don’t overmix the topping. Baking at the right temperature and for the correct time also helps.
Can I make a gluten-free apple crisp?
Yes, you can make a gluten-free apple crisp. Just replace the all-purpose flour in the crisp topping with a gluten-free flour blend.
What are some creative flavor combinations for apple crisp?
Try adding different spices like nutmeg or cardamom for a twist. You can also mix in other fruits like cranberries or blueberries for unique flavors.
How do I reheat apple crisp?
To reheat apple crisp, bake it at 350°F (175°C) for 15-20 minutes. Or, microwave individual servings for 30-60 seconds until warm.
Can I freeze apple crisp?
Yes, you can freeze apple crisp. If freezing before baking, assemble and cover tightly. After baking, let it cool completely before freezing.
What are some classic toppings for serving apple crisp?
Classic toppings include vanilla ice cream, whipped cream, or caramel sauce. They pair well with the warm apples and crunchy oat topping.
How to Make the Best Frozen Waffles at Home
How To Learn OLD FASHIONED STUFFED BELL PEPPERS RECIPE
Easy Old Fashioned Salmon Patties Recipe for a Perfect Meal


One Comment